Pages

Saturday, October 5, 2013

How to Export Your iPhone Contacts


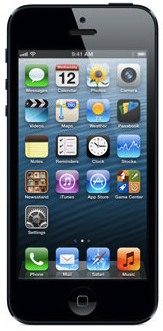
Looking to export your iPhone contacts from your Apple handset? There's now an easy way to do it, thanks to iCloud.
We've taken a look at how you can download all your iContacts, then save them to your computer for a handy backup list, or import them into the likes of Gmail.
Take a look through our simple step-by-step instructions above. Let us know in the comments below any other iPhone walkthroughs you'd like us to tackle — we could cover them in a future feature.

Transfer Photos from iPhone to Computer

Transferring Photos from iPhone to a ComputerYou can easily transfer Photos from your iPhone to your computer, and the process is very similar whether you are on a Mac or PC. The Mac treats the iPhone like a digital camera, and Windows can treat the iPhone as either a digital camera or a file system, depending on how the photos are accessed. Regardless of what OS you are using, to get started you will need your iPhone, the included USB cable, and a computer to plug the device into.

We’ll cover the Mac OS X methods first, and Windows methods second. Before beginning, make sure the iPhone is unlocked.

Transfer Photos from iPhone to Mac

In almost all cases, the fastest and simplest way to copy pictures from an iPhone to a Mac is with Image Capture and Preview. We’ll discuss how with both apps:
Image Capture for copying pictures from an iPhone to a Mac

Using Image Capture to Import Photos in OS X

This is a fast and efficient way to pull photos off the iPhone, which treats the device as a digital camera:
  • Open Image Capture from the /Applications/ directory (or through Launchpad)
  • Connect the iPhone to the Mac through USB
  • Select a folder from the menu (default is Pictures folder) and then click “Import All”
  • OR: Select individual photos, and click “Import” to only copy those pictures over
You can also transfer pictures to your Mac with iPhoto or Preview, which is just as simple and actually has a virtually identical interface for initiating the transfer. Here is how to import with Preview:

Copying Photos with Preview

Though Preview is usually thought of as an image viewer, it can also serve as a fast importer:
  • Plug your iPhone into your Mac
  • Launch Preview
  • From the File menu navigate down and select “Import from iPhone…”
  • Select “Import All” to get all the pictures, otherwise individually select pictures and click ‘Import’
  • Look in your ~/Pictures/ folder for the photos from your iPhone
transfer photos from iphone
Optionally: Click the checkbox with “Delete after import” if you want to delete the photos after they have been copied over to the computer.
The benefit of using either Preview or Image Capture is that these apps are on virtually every version of OS X since from the very beginning of the OS, so you won’t find a Mac version without them. iPhoto on the other hand is generally limited to the consumer model Macs, thus making it not always available on pro models, but it does work as well, and iPhoto will also serve as a photo manager of sorts.

Transfer Photos from iPhone to PC

On a Windows PC the easiest way to get pictures from your iPhone is to just use Windows Explorer, but there are two ways to go about this. In either case, unlock the iPhone before beginning, or else the photos may not be visible.
Using Windows to copy pictures from an iPhone to a PC

Using Windows Plug & Play

This utilizes the pop-up that shows by default in Windows when a device is connected to the computer by way of USB.
  • Plugin your iPhone to the computer without iTunes running
  • Wait for a popup asking you what you want to do with the device
  • Select “View Content”
  • Find your photos through the folders that are displayed
  • Copy the images from Windows as usual
Note that in Windows 7 and Windows 8 you will often find the iPhone mounted under “Portable Devices” but it can also be found listed under “Digital Camera”. Opening either will work to copy the pictures over, but typically Digital Camera opens directly to the DCIM directory whereas Portable Devices will sometimes require minor navigation within the folder to copy the files.

Using iPhone as Digital Camera in Windows Explorer

If your iPhone is already plugged into the PC, you can also try this method:
  • Open “My Computer”
  • Find the iPhone, it will appear as any other camera would
  • Open iPhone to find your Photos
  • Select the pictures you want to copy to your computer and copy/paste them into the desired location on your PC
The Windows approach treats the iPhone more like a file system, just like it does with standard digital cameras that are connected to a PC. That generally makes Windows even easier for moving pictures back and forth if you like to cut & paste things directly from one folder to another in My Pictures or My Documents. Nonetheless, you can also use your favorite photo importing application to pull the pictures from the device as well.
Remember, if the iPhone pictures are not showing up in Windows, make sure the iPhone is unlocked first. Otherwise the iPhone will be found in ‘My Computer’ but all of the content on it will be invisible and inaccessible. If you run into that, all you need to do is touch the iPhone, unlock the screen and enter the passcode, and all of your stuff will be visible as expected.
Finally, you can also sync your photos using just iTunes on either Mac OS or Windows but that is more for iPhone backup purposes and doesn’t really serve as a means of accessing individual pictures.

how to download youtube videos

Question

How do I download or save a YouTube video to my computer?
YouTube

Answer

YouTube has been designed to only allow users to watch and view videos on their website. Many users want to save their favorite videos to their computer so they can watch them without being connected to the Internet or so they can watch them on other devices. Below are the steps required for downloading and watching YouTube videos on your computer for free.

Note: these steps are for saving a YouTube video and not saving only the audio of a YouTube video to an MP3 file.

Saving YouTube video as a video file on your computer
Today, there are several online websites that allow you to enter the URL of the video you wish to save to your computer, and get a link to download the file. Below is the simple three step process that will link you to a page that 

1. Go to the YouTube video page and copy the URL of the video you wish to save. For example, below is a URL to a video on YouTube, the whole address would be copied.
http://www.youtube.com/watch?v=R3ymHMgFAps

2. Once this address has been copied, paste that URL into the below URL text field and click the Download Video button.
3. If done properly, a new window will open with available video formats that can be saved. For most users we suggest the MP4 format, other formats may include FLV, 3GP, and WebM.
Other YouTube download sites

In addition to using the above box to convert your videos there are also many other websites and services that will allow you to download YouTube videos. Below are just a few of our favorites.
Caution: These services can be used to save any flash videos online and can be used to save adult related videos, which unfortunately means when viewing these pages you may be subjected to adult related content.
 
Watching a FLV video on your computer
Once the .flv file has been downloaded to your computer, you'll need a player that supports .flv files. Below are a few suggestions.
VLC media player
http://www.videolan.org/

Windows Media Player
Microsoft Windows users also have the ability of playing FLV files in Windows Media player with the right codec. Downloading and installing the CCCP codec will install this codec, as well as many other codecs you'll likely need in the future.
Converting the YouTube video to a different movie format
There are dozens of different software programs and online services available that will allow you to convert FLV files into another format. Below is a short listing of some of the free services and products we recommend.

Media Convert - An excellent online service that can convert FLV files into dozens of other formats.
http://www.media-convert.com/
Vixy - Another great online service that allows you to download and save YouTube video files to another format.
http://vixy.net/


Detailed Information about NT WiMAX.

WiMAX- the latest access technology in Nepal for high speed internet, is going to be launched by Nepal Telecom from Chaitra 14, 2069 to general users. The service was already launched for corporate offices, some four months back but now with the availability of abundant WiMAX USB dongle, and coverage being expanded to 49 districts of the country, Nepal Telecom is launching it to general home users with some introductory offers too. Before going to the price of CPE and tariff, let us make you clear on something.
WiMAX is a new generation internet technology that can provide maximum speed of tens of Mbps but it depends on the frequency bandwidth used and signal strength at your place but NT ensures minimum of 256 Kbps to its customers. To access the service, you need to have a separate WiMAX device (CPE-Customer Premises Equipment) connected to USB of your Computer or your mobile/computer may already have the WiMAX support. Currently there are three different types of CPE- Outdoor CPE, Indoor CPE and USB dongle. NT tells its customer that Outdoor CPE can work in 15 km from the Wimax tower, whereas Indoor CPE and USB dongle works for just 5 km and 2 km distance from the WiMAX Base station.
Price and range of different types of CPE.
Outdoor CPE: Rs 19,000  Range: 15 km
Indoor CPE: Rs 12,000  Range: 5 Km
USB Modem: Rs 7,000 Range: 3 km
USB dongle: Rs 5,000 Range: 2 km.
NT Wimax Coverage:
Here is the coverage area of WiMAX inside the country(click the picture to enlarge).
Introductory offer:
NT has announced an introductory offer for the WiMAX service that they will be giving 50 percent discount to the customers for 3 months subscription and 15 percent discount for one year package subscription.
Here is the introductory tariff for new WiMAX service (click the picture to enlarge.)

 
Counters:
NT Sundhara and Jawalakhel counter.
4 WiMAX vendor counters in Kathmandu ( Baneshwor, Durbarmarg, Kupondole and Putalisadak).
Outside Kathmandu (Pokhara, Biratnagar, Chitwan, Butwal, Dhangadi and Mahendranagar).

Plus they say they will be having more of such counters and also a dedicated customer support call center for WiMAX.

Nepal Telecom's offer for Dashain to Chhath festival

OCT 5, 2013: Nepal Telecom has announced several offers for this festive season from Dashain, Tihar to Chhath, in addition to the 50 percent discount in WiMAX ODU. The offer ranges from SMS discount to free calls to call discount to data discount and bonus. NT has offered 50 percent discount in SMS for its GSM/CDMA mobile which is only valid for the duration 2070-6-24 to 2070-7-01 and 2070-7-16 to 2070-7-23. Fixed phones (PSTN plus CDMA C-phone) are entitled to get 25 free local calls from Rental Rs 200 for the month of Ashwin and Kartik.


It is also known that there will be 10 percent discount in voice calls for GSM/CDMA prepaid and postpaid customers. In comparison to GSM, there are more offers for NT CDMA customers like 20 percent discount in data tariff for CDMA EVDO/PDSN, and bonus for the voice calls in CDMA postpaid/prepaid.
CDMA bonus amount will be given according to the amount spent in the mobile.
Amount spent 
Bonus
Rs 1-Rs 10
Rs 1
Rs 11- Rs 20
Rs 2
Rs 21- Rs 30
Rs 3
Above Rs 30
Rs 5
Those voice/SMS/Data discount are valid for the duration 2070-6-24 to 2070-7-01 and 2070-7-16 to 2070-7-23, which were used to be valid for the whole festive season from Dashain to Chhaath in previous years.
Plus there is a 50 percent offer for WiMAX tariff with three months subscription at once, valid from 2070-6-20 to 2070-7-23.

 
You might like this one..Nepali Mohit chauhan

Sunday, September 8, 2013

NTC WiMAX price in Nepal

What is WiMAX Service?
"Worldwide Interoperability for Microwave Access" - A last mile wireless access technology capable of providing high speed broadband connectivity.

How does NT WiMAX Broadband work?
NT WiMAX Broadband service transmit radio signals from a base tower to a modem. The modem easily connects to your computer. Once you plug in your modem, your connection is always on and always secure.

Is NT WiMAX Broadband secure?
NT WiMAX Broadband runs on fully licensed and protected radio frequencies. This tecnology provides as much or more security than traditional wireless Internet solutions.

Where can I use WiMAX service?
WiMAX service is roaming enabled. This means that you can use it anywhere in the specified WiMAX coverage in a country.

What is the range of WiMAX base station?
WiMAX base station�s range extends from approximately 10 km in built up areas with lots of obstacles, to approximately 20 km in ideal conditions such as flat land.

Can I use WiMAX service at home & at work?
Easily! Subscribe a plan as per your need and you can primarily use the service. You should know whether the service is available in that perticular location where you are planning to use it.

How fast is NT WiMAX Broadband service?
Customers can get upto 20 Mbps depending upon the types of CPE used and the location of Base Station.

Is NT WiMAX Broadband reliable?
Yes, With NT WiMAX Broadband you'll enjoy your connection that is "always on".


Will I be able to setup NT WiMAX Broadband services on my comoputer myself?
Our technicians will come to your home or place of buiness to install the anteena and run the wiring. They will connnect one computer upon installation. If you choose to opt for a wireless connection inside your home, such as laptops, smart phones, you will need to purchase a wireless router. Our Techincians can provide the wireless router at installation.

Can I have multiple computers on the internet simultaneously?
Our Residential customers can use a router or wireless access point so that multiple users can be online at the same time with only one subscription and no slow-down. Our Business customers should work with our dedicated sales team to find a plan that will support all of your business needs, no matter how big or how small.


WiMAX Volume Based Package

  1. Data Rate of 256 Kbps
    Monthly
    Volume (GB)
    Tafiff (Rs.)
    5
    650.00
  2. Data Rate of 256 Kbps
    3 Months Package
    Volume (GB)
    Tafiff (Rs.)
    Discount
    Tafiff after discount (Rs.)
    15
    1,950.00
    50%
    975.00
    30
    3,300.00
    50%
    1,650.00
    45
    4,500.00
    50%
    2,250.00
  3. Data Rate of 256 Kbps
    1 Year Package
    Volume (GB)
    Tafiff (Rs.)
    Discount
    Tafiff after discount (Rs.)
    60
    7800.00
    15%
    6,630.00
    120
    13,200.00
    15%
    11,220.00
    180
    18,000.00
    15%
    15,300.00
  4. Data Rate of 512 Kbps
    Monthly
    Volume (GB)
    Tafiff (Rs.)
    8
    850.00
  5. Data Rate of 512 Kbps
    3 Months Package
    Volume (GB)
    Tafiff (Rs.)
    Discount
    Tafiff after discount (Rs.)
    24
    2,550.00
    50%

    36
    3,750.00
    50%
    1,875.00
    60
    6,000.00
    50%
    3,000.00
  6. Data Rate of 512 Kbps
    1 Year Package
    Volume (GB)
    Tafiff (Rs.)
    Discount
    Tafiff after discount (Rs.)
    96
    10,200.00
    15%
    8,670.00
    144
    15,000.00
    15%
    12,750.00
    240
    24,000.00
    15%
    20,400.00
  7. Data Rate of 1 Mbps or above
    Monthly
    Volume (GB)
    Tafiff (Rs.)
    12
    1,340.00


    Note: NT shall provide discount of 50% in 256 kbps/256 kbps (downlink/uplink) package for single place at all VDCs of Nepal or in case recommended by any VDC for single place.

How to configure NCELL GPRS in Blackberry

Are you looking for setting that will work for BlackBerry? Search no more, here is the stepwise guide to configure NCELL GPRS setting for BlackBerry.


Step 1: Click on Menu button      
Step 2: Go to options
Step 3: Go to Advanced Options
Step 4: Go to TCP/IP setting
Step 5: Enable the APN settings
Step 6: Once you have enabled APN setting, use "web" without quotes on username field. There are two fields to input APN and use "web" on both on them. Now you are almost done.
Step 7: Leave password field blank.
Step 8: Restart your BlackBerry and you are done. Enjoy the GPRS on your BlackBerry.

Final Note: You will not be able to use GPRS on BlackBerry browser so, you will have to install Opera Mini or Bolt Browser via other media like Wi-Fi or download through you computer and install it with the help of BlackBerry Desktop Manager. 

Cheers.
Related Posts Plugin for WordPress, Blogger...

Follow The BLOG